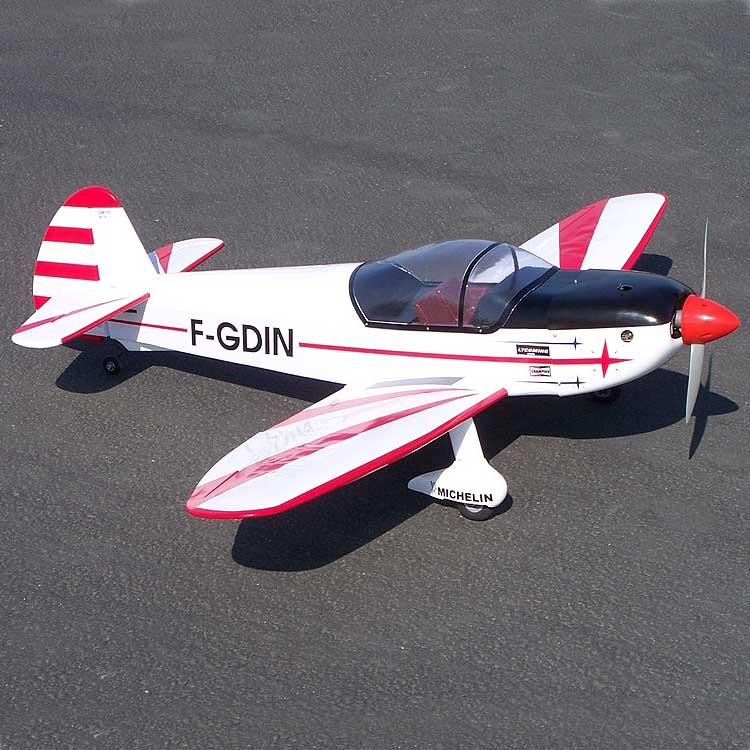
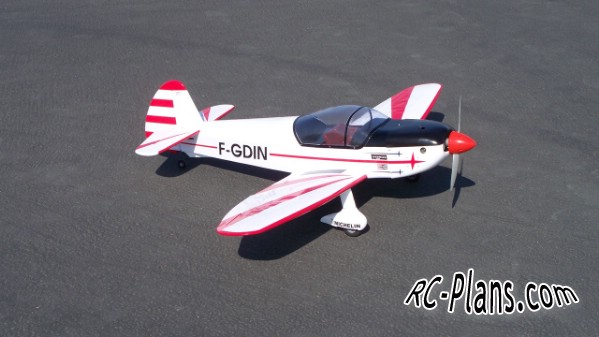
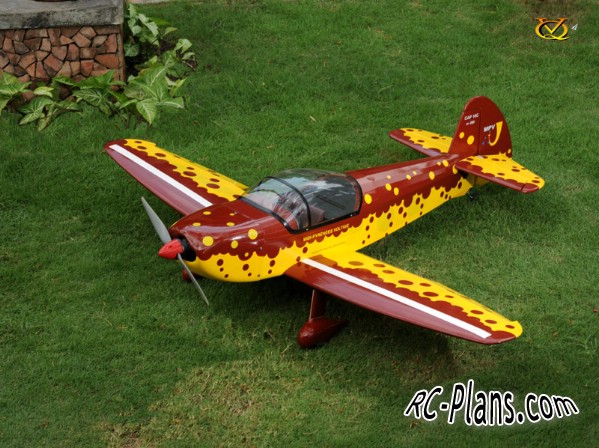
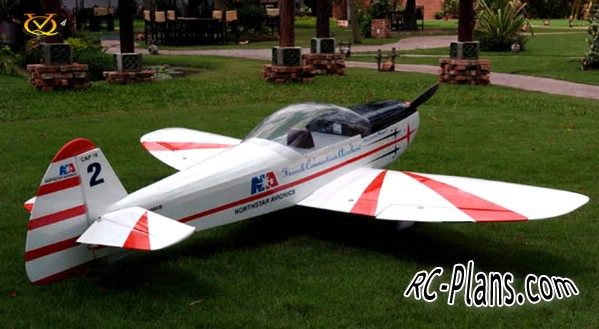
Rewiev: Today's R/C is filed with Extras & Edges, the Cap-10b will standout and gives you an aerobatic performer that’s different than most on the flightline.
Specifications
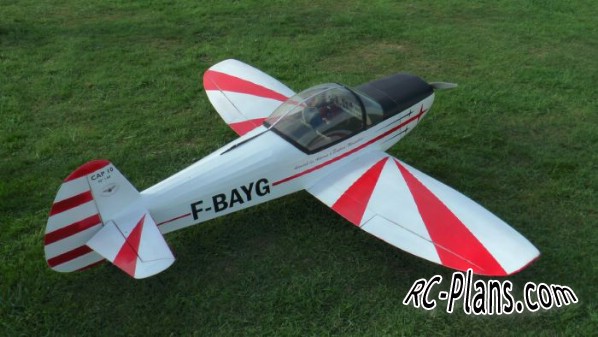
- Name: Cap-10b
- Wingspan: 54 in.
- Wing area: 486 sq. in.
- Airfoil: symmetrical
- Weight: 4 ½ — 5 lbs
- Wing loading: 21.3 – 23.7 oz. per sq. ft.
- Length: 46.5 in.
- Radio: 4 channels, 5 servos
- Engine: .40-.46
Design:
I used a variety of software in creating the plan. Once the 3-view was scanned and stored as a GIF file I cleaned the file of all specks and imperfections. Corel Trace (part of the Corel suite of products) was used to trace the graphic file and it was stored as a DXF file. The DXF file was imported to ModelCad. The design was the most work of this project. I spent many hours drawing and redrawing lines to ensure that once the parts were cut out they would fit together.
The prototype used a flat bottom wing, to increase manoeuvrability and improve inverted performance this version makes use of a fully symmetrical airfoil. The scale airfoil is a NACA2412 this is a semi-symmetrical airfoil that I think would also work very well. I completed the basic plan using the scale outline from the 3-view. After I had it completed I compared the basic parameters to Andy Lennon's guidelines in his book "Basics of Model Aircraft Design". The aspect ratio, horizontal and vertical stab areas, moment arms etc all appeared to be within the limits. This is an excellent book and I encourage anyone that is interested in designing models to buy a copy.
The next thing I needed to do was determine the centre of gravity. Again using the book as a reference I set the CG at 25% MAC (Mean Aerodynamic Cord).
Construction:
If you have built 2 or 3 planes from kits you shouldn’t have too much trouble building the Cap-10b. If you have successfully flown low wing planes you can handle the Cap-10b.
Start by making a ‘kit’; cut each part from balsa and plywood as indicated on the plan. When you have all the parts made, sort them, left wing parts, right wing, fuse, etc. Using a felt tip marker label each part F1, F2, etc. Doing all this before you start gluing will save time looking for pieces during construction. I used CA and a little epoxy for construction. You can use ambroid, carpenter glue etc if you prefer.
Wing:
The wing for the Cap-10b is traditional built-up balsa. Place the plans on your building surface; cover them with wax paper to protect the plans. Build the right wing first, pin the 3/16 hardwood spar in position on top of the plans. Starting with W2 fit it over the spar tab side down. The rib should fit over the spar and the tab should rest on the building surface. Use a drop of CA to glue the rib to the spar. Now do the same for W3 to W11. W1 is sloped 2.5 degrees towards the wingtip, using the dihedral guide glue W1 into position. Epoxy the plywood doublers for the landing gear block to ribs W2, W3, & W4. Epoxy a 1/2" x 3/4" x 1 1/2" hard balsa block to the root side of rib W2 (The wing dowel will be glued into the bock in a later step). Fit the top spar into the ribs and apply CA. Shear webs are used to increase strength, glue them into position for the first 6 ribs. Glue a ½”x1/4” balsa stick to the trailing edge of ribs W1 to W6 and to W6 to W11. Cut a ¾” x 30” strip of 1/16 balsa for the leading edge cap. Glue the strip of 1/16 balsa to the LE of W1 to W11. Sand the top of 1/16 LE flush with the wing ribs, sand the top of ¼ TE flush with the ribs.
Cut 2” wide 30” strips of 1/16” balsa this will be used for the wing sheeting. Glue the wing sheeting to the top of the wing. The sheeting will overlap the LE and TE cap strips. Next glue ¼” x 1/16” rib cap strips on the top of ribs.
That completes the top of the right wing. Remove the wing from the building board flip it over. Remove the wing rib tabs, sand or cut flush with the rib. Epoxy the ply doublers to ribs W2, W3, W4, epoxy the landing gear block into position. Apply 1/16” sheeting to the bottom of the wing, using the same procedure as done for the top. Add the LE and TE by gluing them to the cap strips, sand to shape. Glue the wingtip to rib W11 add balsa filler blocks and sand to shape.
The aileron is cut from a 1/2" piece of sheet balsa. Sand the aileron to match the contour of the wing. Sand the leading edge of the aileron in a "V" shape.
The servo can be mounted on its side on a 1/16 piece of plywood. Install the servo in the wing bay between rib W6 & W7.
Complete the previous process to build the left wing.
Epoxy the two wings together using a 2” block under rib W11 to set the dihedral. Apply a 2” fibreglass strip the wing centre.
Horizontal & Vertical Stabs:
Pin the plans for the H & V stabs to your building surface. Protect the plans with wax paper. Using 1/2"x1/4" and 1/4" sq. balsa sticks construct the stabs on top of the plan. Sand the outer edges of the stabs round. Sand a "V" shape in the hinge of the rudder and elevator.
Fuselage:
Epoxy the fuselage doublers making a left and right fuse side. Glue F2A to F2 aligning the holes. Glue F2 & F3 to the left side of the fuse; ensure that they are perpendicular to the fuse side. Glue the right side of the fuse to F2 and F3. Using the plan as a guide glue the aft end of the fuse together (make sure the fuse is not twisted). Epoxy the wing hold down blocks (spruce) to the fuse doublers & F3.
Back to the wing. Cut the TE so the wing fits in the wing saddle. Centre the wing to the fuse, drill ¼” holes in the LE using F2 as a guide. Glue 2” long ¼” dowels into the LE of the wing. Square the wing to the fuse using your favourite method (distance from left wingtip to tail equals distance from right wingtip to tail). Drill wing & wing blocks tap for a ¼” nylon wing bolts. Glue the parts WF to the wing sheet between them with 1/8" balsa. Don't forget to cut holes in the sheeting to access the wing bolts.
Epoxy F1 in position on the fuse, epoxy tri stock balsa in the corners for strength… Fit formers F4 & F5 into position in the aft section of the fuse. When you are satisfied with the fit and that the fuse is warp free glue the formers.
Check the fit of TD1 and glue it into position. Between TD1 and F3 sheet the top of the fuse with 1/16 balsa (glue the balsa across the fuse not lengthways). Glue former TD4 to the fuse as shown on the plan. Cut the 3/16 hardwood stringers to length between TD4 and F5. Ensure that the stringers are cut or sanded flush with the back of F5 and the front of TD4. Carefully align TD3 and glue it to TD4, there should be a 1/16 overlap of TD4. Glue the 1/8-balsa triangle parts TD2a and TD2 to the sheeting on top of F3. Sheet the area between TD2 and TD3 with 1/8 balsa.
The front turtledeck should be completed next, sheet the area between TD1 and F1 with 1/8 balsa.
Pin the H & V stabs into position on the fuse (DO NOT GLUE). Using a scrap piece of balsa make the fillet between the H & V stab. Shape and sand the fillet to match the contour of the fuse. Remove the stabs; glue the fillets into position on the fuse. The stab and fin will be glued into position after they are covered.
The engine box consists of 5 pieces of plywood. Drill holes in FW to match your engine mount and two 1/4" holes for the fuel lines. Install the blind nuts for your engine mount in FW. Epoxy the 4 sides of the engine box and FW together. When the epoxy has cured check the fit of the engine box through the hole in F1 don't glue it, it will be glued into position later.
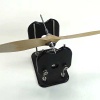
The cowl is the most labour intensive part of the plane. Glue C1 to a 1/2" balsa 4.5” x 5.5” as shown on the plan. The cowl is basically a balsa box made of 1/2" balsa. Using the plans as a guideline for the sides and top of the cowl make the balsa box (cowl). When the cowl top, bottom, and sides are glued together (see photo) the labour intensive part starts. Sand and shape the cowl to have smooth rounded corners. The balsa is sanded to blend with the 1/32 ply former C1.
Sheet the bottom of the fuse with 1/8" balsa (across fuse). Glue F6 into position on the bottom of the fuse.
Position and epoxy the engine box to F1 and F2. The distance between the back-plate of spinner and F1 should be the length of the cowl plus 1/8". Cut holes in the cowl and F1 as required to fit the engine you are using. If the engine is completely enclosed in the cowl (most will be) cut a semicircular hole in the bottom of the cowl to let hot air escape. Strengthen the joints between the engine box, F1 and F2, epoxy tri stock balsa in the corners.
Canopy:
The canopy took a long time to figure out what to use. After much searching, trial and error I found a solution. The Great Planes Giles G-202 .46 canopy will fit. It needs to be trimmed to fit but it works very well. Trim the GP G-202 canopy to fit the Cap-10b. You should allow a 1/8" to 1/4" overlap around the sides of the fuse.
Final Assembly:
You're almost done. The hard work is behind you. The next few steps are the same as any kit you have constructed in the past.
Cover the plane using your favourite type of film or fabric. There are various scale colour schemes on the Internet, choose one or use your imagination. Glue the horizontal stab and fin to the fuse after each has been covered. Hinge the ailerons, rudder, and elevator halves, I prefer to use CA type hinges. Glue the canopy to the fuse. Install the main landing gear and tail wheel.
Install your engine, the engine should have 2 degrees of right thrust and 1 degree of down trust. Next install your fuel tank, radio gear, and push rods. Balance the plane on the wing spar.
Set the control throws as follows, elevator ½” up/down, rudder 1” left/right, ailerons 3/16” up/down.
Flight:
Before you attempt to test fly check everything once more. Charge the batteries; ensure you have a smooth running reliable engine. Range check the radio, check that all control surfaces are moving in the correct direction, check it again.
Start your engine and prepare for the take-off.
Landing and Take-off:
The Cap-10b handles well on the ground, use up elevator when taxing. During take-off use a little right rudder to keep it tracking straight. Advance the throttle slowly for the take-off. Climb out is smooth and steady.
The landings are easy, as the plane will fly slow and controlled. Use a little power until the plane is over the threshold at approximately 10 feet. Cut the throttle to idle and let the plane settle, flaring at approximately 2 feet.
Slow Performance:
The Cap-10b will fly very slowly; this is a result of the wing area and low weight. The Cap has no tendency to tip stall. Stalls are straight ahead with easy recovery. The control response is good and predictable. Use some rudder in the turns to keep them well co-ordinated.
Fast Performance:
If you built this plane for speed you built the wrong airplane. The Cap will scoot along quickly; it isn’t a speed demon. If you want a fast airplane the Cap has too much frontal area. At high-speed (for a Cap-10b) the aileron rolls are fast and axial. Control response is quick and controllable, there is no tendency to snap or stall in high-speed turns.
Aerobatics:
This is another reason why I designed and built the Cap-10b. It will do all the basic manoeuvres loops, rolls, stall turns etc. If you can dream it up the Cap will do it. Although not designed for 3D flight it will do a torque roll and it does very nice harrier passes.
Summary:
The Cap-10b is an honest aerobatic plane that you will enjoy flying every weekend.
__________________
Carl Layden